
designing a still life
Great paintings don't just leap off the easel as a result of the ever-brilliant hand of the artist gracing the surface of the paper. No, great paintings are the result of careful planning, thoughtful design, and patient execution. Have I removed all the romance for you yet? Not to worry, there is still much inspiration in the process. If you're not too discouraged, then continue reading to see how I created this simple still life using vine ripe tomatoes and an antique pewter teapot. There is always beauty to be found for all who are willing to quiet themselves and really look for it.

Step 1: arranging the objects
The first thing I did was buy some vine ripe tomatoes at the local grocery store. I love the lush color, round shape, and wonderful greenish accents of the vines that these rotund vegetables provide. I bought this pewter teapot at a church tag sale in Rockport, MA during a weekend holiday visit there two summers ago. I've been waiting for the opportunity to employ it in a still life painting ever since. With a spot light setup left of the table and slightly above horizontal, I created some dramatic light and shadow patterns on the objects while arranged them on the surface of a small antique table. I also hung a dark blue backdrop behind the subject to create a rich, deep relief for my painting.
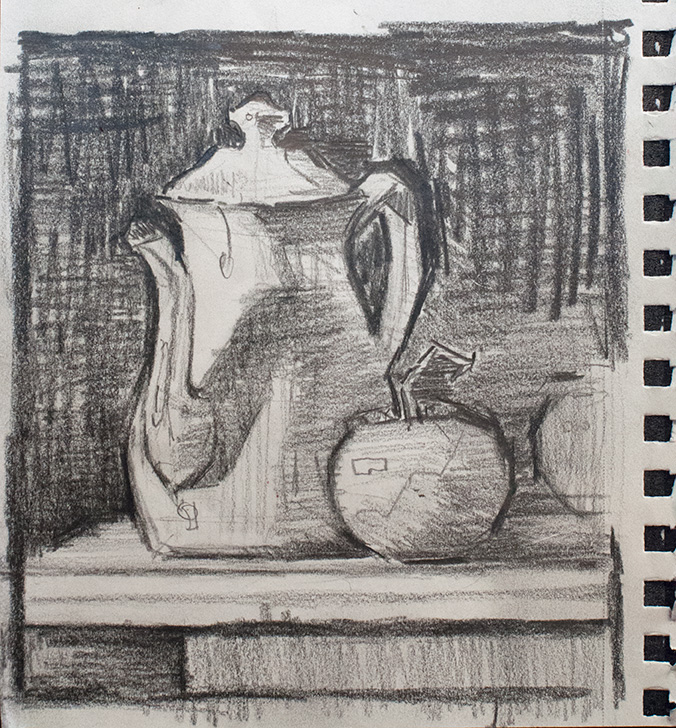
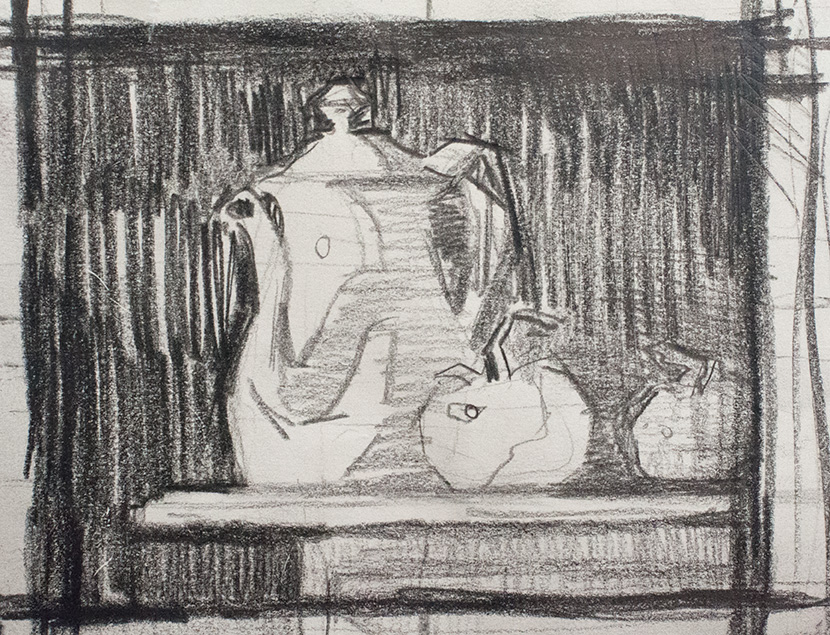
step 2: the thumbnail sketch
Once I have a setup that I'm interested in, I pick up my soft Ebony pencil and a small sketchbook, and I begin to design the painting. I tried two approaches, which you can see in the slideshow, and settled on a design that was horizontal, picking up on the profile edge of the table. In order to do this, I sat in front of my setup from a low angle, keeping the table directly at a 90 degree angle from me, and the top of the table at eye level. This creates this striking horizontal surface to show off the teapot and tomatoes. I also wanted to crop one of the tomatoes as a lead in shape. Thumbnail studies are about problem solving, not gorgeous little drawings. In them I clarify the shapes, simplify the values, and design the composition. When I've done those three things, I move on.
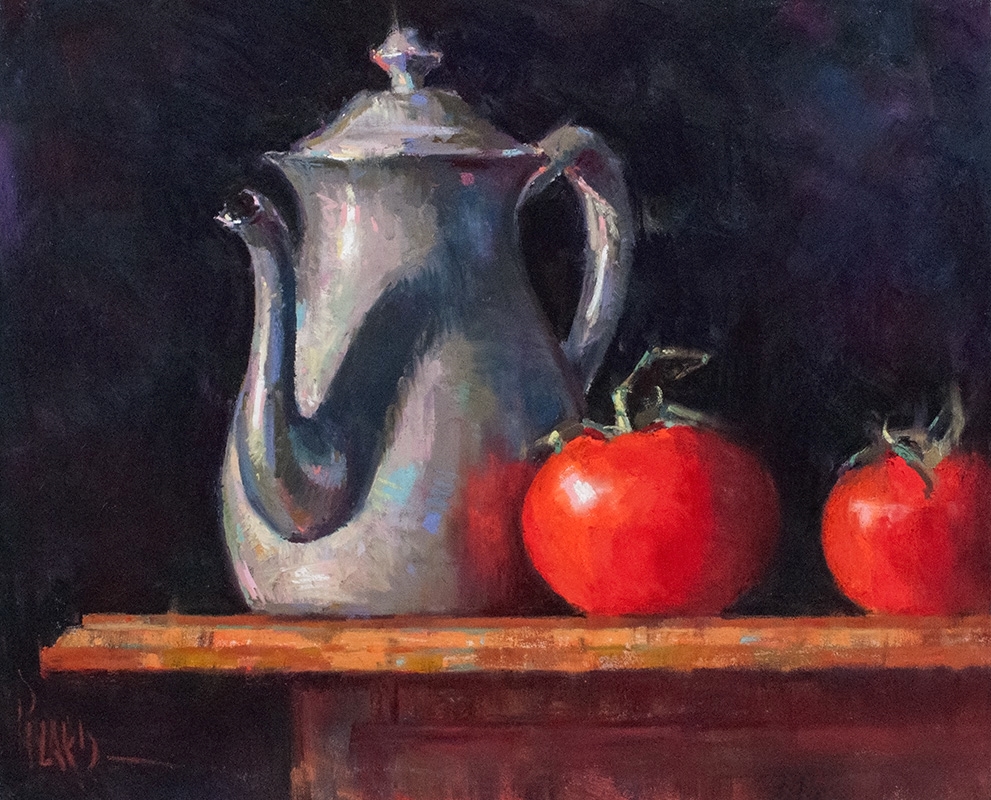
step 3: The pastel painting
I had a piece of 10x12" Wallis Museum Grade Paper in the studio mounted to Gatorboard, so I used it for this painting. The first step was to recreate the drawing blueprint with extra soft vine charcoal on the white paper. Once that was done, I jumped right in with soft pastel and developed the big masses of the painting, starting with the darks and working toward the lights. You can see me working from life in my studio in the image slideshow above. What a joy it is to take the time to really design the painting, and to slowly develop the shapes until you realize your initial vision. Looking at sketch #2 in the slideshow, you can see that this vision was realized in the final painting.