
The 5 Stages of a Successful Portrait Commission
These 5 steps will help you design a winning collaboration with your next client and grow your portrait business.
You love creating portraits. You’re passionate about people as well as your art, and you want to grow your portrait business. Why? Because getting more commissions and generating income through your art allows you to do what you love- to create- and fulfill your purpose as an artist. This is a common scenario we discuss in my Cultivate Artist membership.
Portrait commissions are a special kind of art; a true collaboration between the artist and the client. When they go well, these two parties work together effectively to bring a beautiful portrait to life. But when they go wrong, the process can be frustrating, stressful, disappointing, and draining for both the artist and the client, and the end product is far from your best work.
A Pathway to Success
So, how do you ensure that all your portrait commissions will be destined for success, leading to more and more commissions? One significant way is to develop a simple step-by-step process that yields your best results, then clearly describe the pathway that you and your client will travel together to reach this destination.
Here’s the thing; your client doesn’t come with a third eye or a crystal ball that enables them to intuitively understand how they ought to work with you to achieve the greater outcome. And they aren’t artists, so they have no idea what you need from them in order to create your best work. That is, unless you clearly describe it to them.
Clear Away the Fog of Confusion
Now I know you are much more passionate about creating paintings than describing the process. Trust me though, if you will take the time to define a step-by-step portrait process that clearly describes how you and the client can collaborate together to achieve the best result…you will clear away the fog of confusion surrounding the creative process and help your prospective client see what success could look like should they choose to work with you. Keep it simple, no more than six steps, and each step should highlight what you will do for them while describing what you’ll need from them in order to fulfill their wishes for a great portrait.
In the absence of these clear expectations, a client can feel insecure about whether working with you will yield the results they desire. This insecurity may lead them to hire another less talented artist who happens to communicate more clearly than you do. This is tragic since you would have done such an amazing job! Over the years I’ve created a really good process for my commission work and I hope it will help you too.
The 5 Stages of a Successful Portrait Collaboration:
1. THE INTERVIEW- This is where it all begins. You listen well to the client, finding out what their hopes and dreams for the portrait are, as well as who the subject of this portrait will be. Ask a lot of questions to ensure you understand the client’s wishes. What kind of person is the subject? Should the mood be formal or informal? Where will the painting hang? Should the setting be inside or out? Discuss size, medium, clothing, and background options. Then, once you are clear on their wishes, explain the portrait collaboration with them in a simple series of steps. Let them know where you will need decisions and feedback from them in order to make this a winning collaboration. This will remove the client’s fear of “offending the artist” as well as provide them with a clear role to play.
Are You A Good Match?
You should also be sure that your artistic style is the right fit for this project based on their wishes. Show them your portfolio and find out which of your pieces are their favorites. Once you have a clear plan, schedule a date for step two…
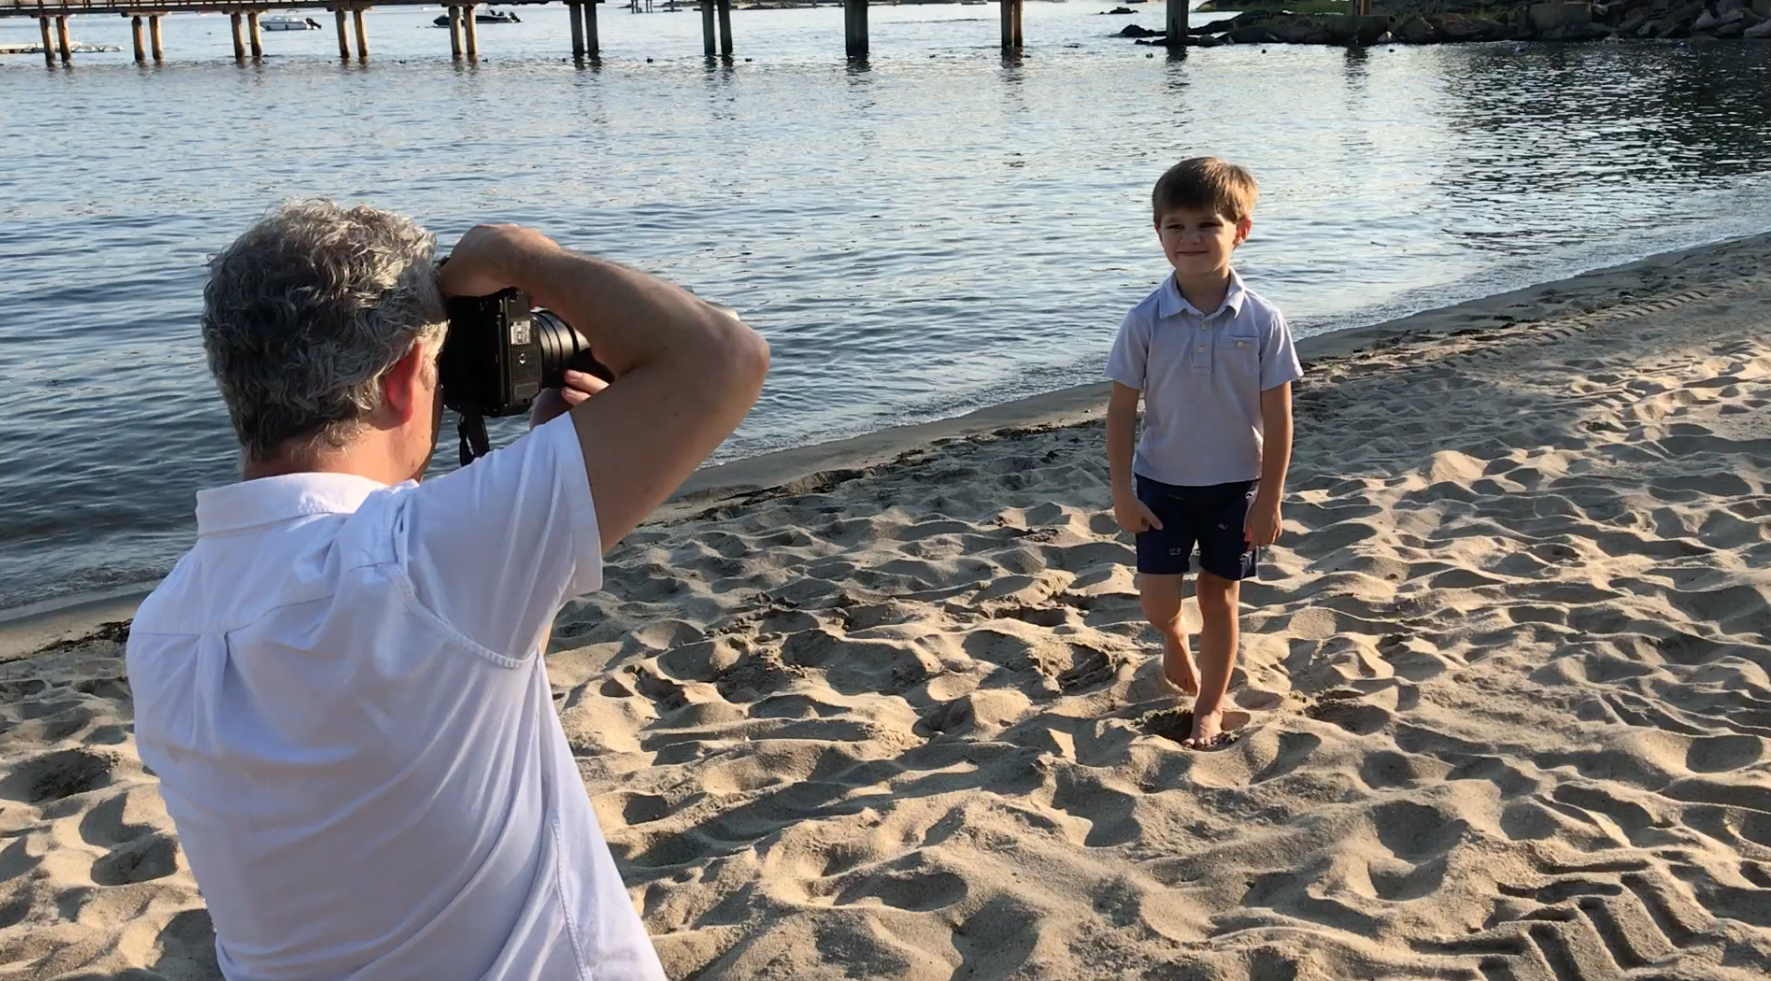
2. THE SITTING & PHOTO SESSION - Another critical step in the development of a successful portrait is gaining the reference material. This can be done from life, photographs, or a combination of both. I often work with children, so getting photo reference is very important. If the opportunity to create a sketch from life emerges, even better. The important thing is to be sure to explain what you’ll need from your portrait subject in order to get great reference. A few thoughts on step two:
Direct the process. Take control! Do you prefer afternoon light? Schedule the session outside during sunset. Do you love that indirect window light? Arrange for this. Will you bring your own lights to their home or host them in your studio? Let them know. How much time will you need with them? They are looking to you to be the visionary artist and take charge at this stage.
Be Transparent: I will often let the client see some of the images on the back of my digital camera as I’m capturing them. This gets the client excited as well as giving you some feedback as to what they are responding to.
On Site Image Review I often bring my portable laptop and download the images on the spot, creating a quick favorites folder on the spot of our top 10-20 images. This is an excellent way to narrow down the selection with the client’s involvement so you know you’re on the right track.
Favorites Folder I then let the client know that I’m going to do a further review and edit, and will supply them with a favorites folder online (using something like Flickr or Shutterfly works great). The idea here is that in the end you ONLY SHOW IMAGES THAT YOU KNOW WILL MAKE GREAT PORTRAITS. I like to provide no more than 10 favorites images, and provide personal comments about the pro’s and con’s of each selection.
The Final Selection Once I share the image folder, I sit back and let the client have time to make a final selection for the primary pose and portrait reference. We sign off on it, and I’m on to step 3!

3. IN THE STUDIO- Now that you’ve got great reference and a clear agreement with the client about your pose and style for the portrait, it’s time to have fun painting! I can’t overstate just how significant it is to involve the client in the decision of selecting the pose and reference. This involvement builds excitement and confidence in the direction of the project. They can also begin to imagine what it will look like.
Timeline Let your client know how long you’ll need to develop the portrait in the studio. If you need three months then say, “I’m going to need three months to create a masterpiece for you.” Then deliver it in less time. Don’t say, “I’ll have this for you by next month, and then run late. That’s unacceptable. As an independent portrait artist, your word is your brand. Let your client know that you are going to need them again soon for step 4…
4. THE FEEDBACK STAGE- Once you develop your portrait to a level you feel confident with, it’s time to involve the client again. Let them see the painting, offer feedback to you, then make your final refinements based on their comments. Build this stage into the standart budget and process for your painting, you’ll be glad you did.
Do you need a final sitting? Have this meeting at the studio or go visit them with a portable setup so you can check to make sure skin tones and eye colors are just right.
Not sure how much to refine? Get your client’s feedback on how they feel about the level of finish at this stage. This can happen by sending them a digital image of the painting, or by having a personal meeting. Invite your client to tell you if they’d prefer more refinement in any passages of the painting. They will feel as if they’ve co-created the portrait with you, which is very gratifying for the collector.

5. THE UNVEILING- Now that you’ve made your final changes based on the client’s feedback, any confusion as to whether you are on the right track has been cleared away. From the very beginning of this creative process, you have been narrowing in on a masterpiece for your client, and they can feel it, which further excites them to see the finished portrait. Setup a plan for the unveiling—in your studio, at their home, or even at the framing studio. At this final stage of delivery, you get to celebrate together the development of this beautiful piece of art, while at the same time giving the client a positive experience with you—the artist. Positive experiences lead to great testimonials, which lead to more commissions!
Well done. You’ve implemented the 5 stages of a portrait collaboration with your client that will yield great results and grow your portrait business. Keep up the great work!
If you need help developing your own progress and learning the different techniques to create unique and expressive paintings for all of your art clients, join us in one of my up coming painting courses where we help you hone in your skills as an artist and business.